Upload an Image via Multiform POST Request in Kotlin using Retrofit2 in 2023
If you're an Android app developer looking to provide users with the ability to upload images or for computer vision tasks, you're in the right place. In this blog post, we'll show you how to send an image via post request in Kotlin using Retrofit2.

Note 8. May 2024: Since Kotlin Multiplattform came out, I would now recommend to use ktor for HTTP requests instead of Retrofit2, since Retrofit2 is limited to Android.
In the interface will define URL routes (/v1/uploadImage) that the server can accept and HTTP types (GET, POST, PUT). Retrofit2 uses decorators (@…) to achieve this. It also specifies the response type. I use Call<ResponseBody> first to obtain a raw JSON (think curly brackets { …}), but you can also define a type in Kotlin and cast the response immediately using Call<List<MyImageObjects>>to retrieve an array of image objects (name, UUID, x-coordinate…).
Since we don’t want to send some user information via POST request, but one or several images, our request body will be a MultiPart Form.
When retrieving more complex objects with metadata and countless arrays, it is difficult to cast the JSON response immediately into a Kotlin object. The structure of this object has to match the JSON response in all types. In that case, it is easier to just display the raw JSON response first and write a custom deserialiser of this JSON response for easier debugging.
- Add Dependencies
- Add Permissions
- Preparing the Interface
- View Model
- Main Activity
- Catch Errors
- Conclusion
Add Dependencies
First, let’s add the dependencies to gradle.build
implementation "com.squareup.retrofit2:retrofit:2.9.0"
implementation "com.squareup.retrofit2:converter-gson:2.6.0"
The version might change, you can look it up here for retrofit and gson.
To apply changes, hit Sync Now.
Add Permissions
To access the internet, the app needs permission. The user can later see the required permissions in the app store.
Add Internet Permission to AndroidManifest.xml.
<uses-permission android:name="android.permission.INTERNET" />
Failing to add this will lead the app to crash when sending an HTTP request.
Prepare the Interface
Creating an interface is not strictly necessary, but good practice for interoperability and testability. However, it does not implement the function specifically, meaning how you handle the response is defined later when creating a class that complies with this interface.
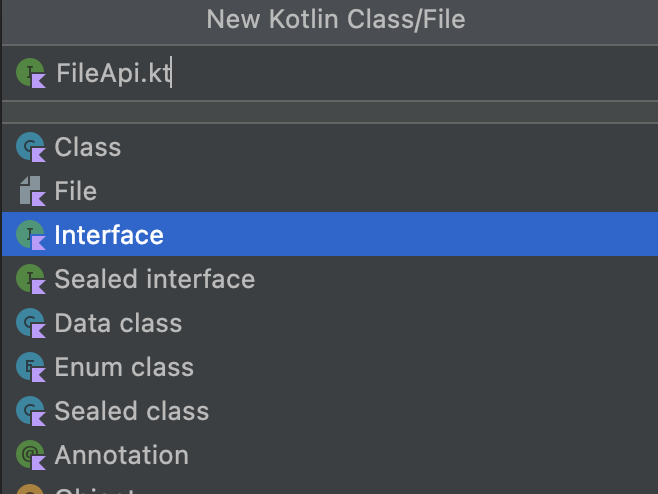
So let’s create a new interface file FileApi.kt.

The first line will be your package name, similar to this.
package com.uploadImage.test
When you use a keyword that hasn’t been imported, Android Studio will give you a hint to do so. But sometimes there are multiple sources for one keyword. The required imports for this interface will be
import okhttp3.MultipartBody
import okhttp3.OkHttpClient
import retrofit2.Call
import retrofit2.Retrofit
import retrofit2.converter.gson.GsonConverterFactory
import retrofit2.http.Multipart
import retrofit2.http.POST
import retrofit2.http.Part
The next line has already been created by the IDE
interface FileApi {
	...
}
Now we define the routes. We want to send a POST request (to send instead of GET something) to http://someurl.com/api/v1/uploadimage as a Multipart form (since we upload an image).
    @Multipart
    @POST("/api/v1/uploadimage")
Next, we use asynchronous coroutines for networking. We add a function, uploadImage, that can be suspended to the background until a result is received.
fun uploadImage(
We define now the @Part that makes up the @Multipart request.
@Part image: MultipartBody.Part
The resulting raw JSON can be obtained as a ResponseBody.
): Call<ResponseBody>
Alternatively, the resulting JSON can be cast into a custom type, e.g., a list of Words. We will make use of this later by adding a second function.
): Call<List<Word>>
So, here we create a companion object, which means that we create only a single instance in the whole application. This is also called a singleton pattern in Kotlin.
// No need to create an instance of an object, just use this class method
companion object {
     ...
}
A singleton is an object that has just one instance and can be accessed globally over the lifetime of the app.
Object is a way to create a singleton. If that object is part of a class or an interface, it is a companion object.
But a companion object of what? A companion object of the OkHttpClient.
// Create HTTP Client for network request
private val client = OkHttpClient.Builder().build()
 val instance by lazy {
	...
 }
Retrofit acts as a layer above a basic http client, and we could choose different ones, so here we specify the client we want to use for our HTTP requests and the baseUrl to the server we intend to send the image to.
Retrofit.Builder()
      .baseUrl("https://testapi.com/")
      .client(client) // add a client instance here, e.g. OkHttpClient
      .addConverterFactory(GsonConverterFactory.create())
      .build()
      .create(FileApi::class.java)
If you would like to use your own local server, you can’t use encryption with https because you need a certificate for this. It is easy to get a certificate by letsencrypt, but you require a domain name and not just a local IP.
But Android doesn’t allow unencrypted traffic per default, so we need to enable it in our testing environment. We do this by going to AndroidManifest.xml and add
android:usesCleartextTraffic="true"
in the <application… tag.
Another way would be to deploy your server on a droplet on Digital Ocean and forward a subdomain like api.yourdomain.com to the IP of this droplet. Then you can enable encryption on your server. In go with the echo framework, you could do this by launching the server by using e.StartAutoTLS instead of e.Start and using port 443.
e.Logger.Fatal(e.StartAutoTLS(":443"))
This generates a Letsencrypt certificate automatically for you.
Now you should be able to access the routes encrypted from your server using https://api.yourdomain.com/v1/uploadImage.
The Class
We create the file FileRepository.kt. It will open an image and call the companion object instance defined above. We will also handle the response, which could be either successful or not. If it is successful, we log the raw JSON response and return true, and if it isn’t, we deal with the errors and return false.
So let’s start with the imports for logging, the HTTP client okhttp3, retrofit2, file and Input/Output exception.
import android.util.Log
import okhttp3.MultipartBody
import okhttp3.RequestBody.Companion.asRequestBody
import retrofit2.Call
import retrofit2.Callback
import retrofit2.HttpException
import retrofit2.Response
import java.io.File
import java.io.IOException
Then we create a function uploadImage, that gets passed a file of type File which we want to upload.
It will add a skeleton for a class
class FileRepository {
	...
}
We add a function, uploadImage, that expects a Boolean (true or false) depending on the success of the request.
fun uploadImage(file: File): Boolean {
	...
}
Next, we set the return variable res to false. It will be switched to true later in the callback function when the request was successful.
var res = false
Then we access uploadImage function of the companion object in the FileApi interface we created earlier. We enclose it in a try block to catch errors.
try {
       FileApi.instance.uploadImage(
                ...
            )
    }
As defined in the interface, we use image as a MultipartBody.Part an argument to uploadImage(). The image is created from file that was passed to this method by the FileViewModel, which we haven’t created yet.
    image = MultipartBody.Part
             .createFormData(
                  "image",
                  file.name,
                  file.asRequestBody()
             )
Now, enqueue() (as opposed to dequeue()) adds an object to the task queue.
.enqueue(
  object : Call<ResponseBody> {
		...
	}
)
...
The response is handled by onFailure() and onResponse(). In case of a failure, we log an error.
    override fun onFailure(call: Call<ResponseBody>, t: Throwable) {
                        Log.e("API Request", "I got an error and i don't know why :(")
                    }
In case of success, we read the response.body() and log it as a string.
    override fun onResponse(call: Call<ResponseBody>, response: Call<ResponseBody>) {
                        val responseBody = response.body()
                        Log.e("API Request", responseBody.toString())
     }
Since the response has been handles successfully, we will set our success switch res to true to return and exit the function.
 res = true
 return res
Otherwise, if we have an IOException or a HttpException we print the error and return false, as res was initially set to false.
catch (e: IOException) {
            e.printStackTrace()
            return res
} catch (e: HttpException) {
            e.printStackTrace()
            return res
} finally {
            Log.e("API Request", res.toString())
}
View Model
Next, we create the view Model FileViewModel.kt.
These are the required imports
import androidx.lifecycle.ViewModel
import androidx.lifecycle.viewModelScope
import java.io.File
import kotlinx.coroutines.launch
In the class FileViewModel we add an instance repository of a FileRepository we defined in the previous section.
class FileViewModel(
	private val repository: FileRepository = FileRepository()): ViewModel() {
	...
	}
We launch an asynchronous call with viewModelScope.launch to upload the image.
fun uploadImage(file: File) {
	viewModelScope.launch {
		repository.uploadImage(file)
	}
}
MainActivity
Now, we add the viewModel of type viewModel<FileViewModel>() to MainActivity.kt (after your apps theme).
...
setContent {
   UploadImageTheme {
		 val viewModel = FileViewModel()
         // Dependency injection?
         // val viewModel = viewModel<FileViewModel>()
	...
Then we add a Box in which other UI elements are contained
Box(
    modifier = Modifier.fillMaxSize(),
    contentAlignment = Alignment.Center
) {
	...
}
In this case, we just add an upload button. When it is clicked, it will look for the file img.png in cacheDir which we added to the code repository at the beginning of this tutorial.
Button(onClick = {
  val file = File(cacheDir, "img.png")
  file.createNewFile()
  file.outputStream().use {
  assets.open("img.png").copyTo(it)
  }
  viewModel.uploadImage(file)
  }) {
  Text(text = "Upload image")
}
Check if file img.png exists in the assets folder.
Catch Errors
- API server is not available (retrofit2.HttpException: HTTP 403)
- javax.net.ssl.SSLException: Unable to parse TLS packet header
Conclusion
In this post, I described how to send an image as a POST request using retrofit2. First we introduced the dependencies, permissions and talked about pitfalls in encrypted HTTPS requests and Android. We created an interface where we defined the routes. Then we created a class that used this interface and handled the response with success and failure. The file was send from the view model and the view model was accessed after a click on a button in the UI.
